Quick answer: Statue restoration with 3D scanning means digitizing the original statue with a 3D scanner, processing the mesh data, rebuilding broken or worn areas on the computer, and then 3D printing the restored copy in SLA resin (25–100 micron layers, up to 800×800×500 mm) or FDM for large statues, followed by mold making, composite/polyresin casting and faux-finish painting. The biggest advantage: no tools ever touch the original statue, proportions are preserved exactly, and the statue can be scaled up, scaled down or replicated.
Churches, pagodas, communal temples, families and museums often keep statues of great spiritual value that have cracked, lost a hand, worn facial features or peeling paint after many years. The question CT3D hears most is: “How can we restore it exactly as it was without carving or sculpting directly on the original?” This article takes a deep look at digital restoration techniques – a branch of our custom 3D model printing service – combining 3D scanning, digital modeling and 3D printing.
How Is Statue Restoration with 3D Scanning Different from Manual Restoration?
In manual restoration, an artisan builds up and carves directly on the statue or re-sculpts it from photos. The result depends on the artisan’s skill and the reference photos, and it is hard to keep proportions accurate when remaking the whole piece. Digital restoration splits the process into two worlds: the physical world (the original statue is only scanned, never altered) and the digital world (every edit happens on the 3D model and can be redone many times before printing).
| Criterion | Manual restoration | 3D scanning + 3D printing restoration |
|---|---|---|
| Impact on the original statue | Usually requires building up and carving directly | Scanning only, no tools touch it |
| Preserving proportions and lines | Depends on the artisan’s skill | Taken from scan data of the statue itself |
| Missing parts | Sculpted from photos or memory | Rebuilt digitally, can be mirrored from intact parts, approved before printing |
| Scaling up or down | Start again from scratch | Change the scale in the file |
| Replication | Mold taken directly from the original (risk of damage) | Mold taken from the print; the original stays safe |
| Archiving | No digital copy | 3D file kept for the long term |
Source: comparison based on CT3D’s restoration experience.

Step 1: 3D Scanning the Original Statue – Which Scanning Method?
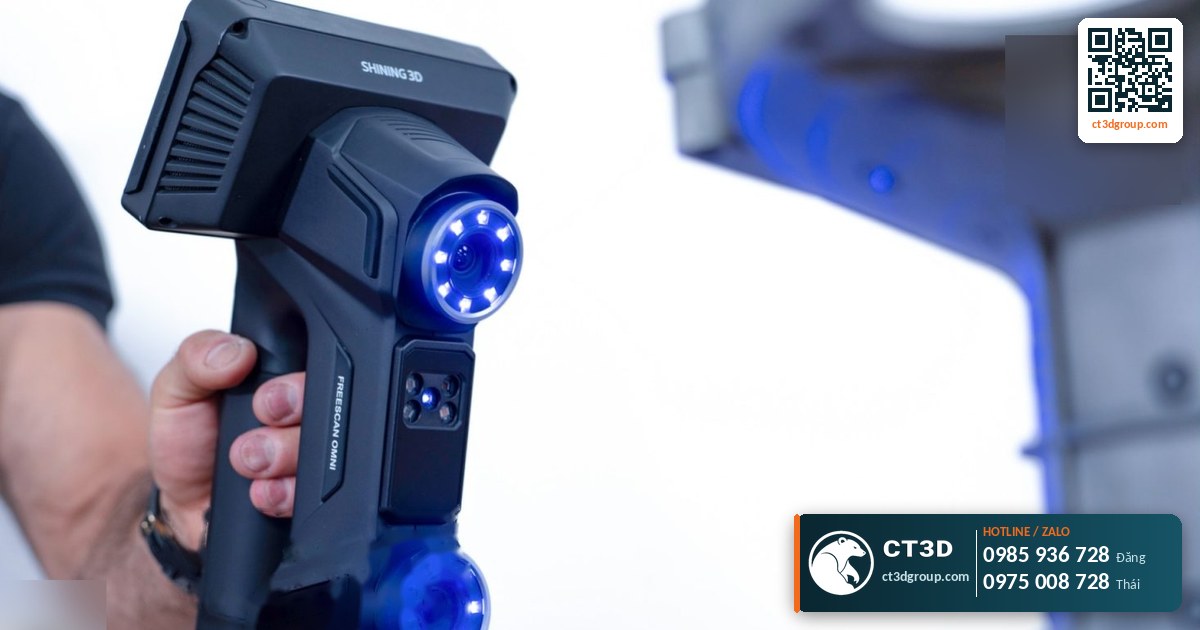
3D scanning measures the surface shape of an object and turns it into a point cloud or triangle mesh on the computer. For statues, there are three common groups of methods:
- Structured light scanning: the scanner projects light patterns onto the surface and cameras read their distortion to calculate the shape. Suits small and medium statues with fine detail.
- Handheld laser scanning: projects laser lines, usually with reference markers stuck on or around the object for positioning. Suits large statues and dark surfaces.
- Photogrammetry: hundreds of photos are taken from many angles and software computes a 3D model. Suits very large statues, outdoor statues and structures; the level of detail depends on the number of photos and the lighting.
Glossy, gilded, glass or very dark surfaces are hard to scan because they reflect or absorb light. In that case a temporary scanning spray (a self-evaporating or wipe-off type) can be applied – but with antique statues, the original paint may flake easily, so CT3D always tests on a hidden area and consults the owner first. If the statue can’t be moved, our technical team scans it on site. For scanning service details, see our 3D scanning service in Ho Chi Minh City or 3D scanning in Hanoi.
Step 2: Processing Scan Data into a Printable Model
Raw scan data can’t be printed right away. Engineers process it in several stages:
- Alignment: each scan only sees one side, so the pieces must be precisely aligned into a single whole.
- Merging and cleanup: remove noise, background and unneeded bases, and merge everything into a single mesh.
- Hole filling: areas the scanner can’t see (armpits, deep folds in robes) leave holes, which must be filled following the surrounding shape.
- Mesh optimization: reduce triangle count on flat areas while keeping high density on faces, hands and ornamentation, so the file stays light without losing detail.
- Watertight check: a 3D printable model must be a closed solid with no open edges or flipped faces.
For print file formats and requirements, see what is an STL file.
Step 3: Digital Reconstruction – Rebuilding Broken and Worn Areas
This stage requires both technical and artistic skill. The main techniques are:
Mirroring
If a statue has lost its left hand but the right hand is intact and the pose is balanced, the engineer can mirror the right hand and then adjust the pose and drapery so it looks natural. Statues are rarely perfectly symmetrical, so manual adjustment is always needed after mirroring.
Digital sculpting
Completely missing parts (nose, fingers, crowns, ornamentation) are sculpted in digital sculpting software based on old archival photos, statues of the same model or the owner’s description. The advantage is that renders can be sent to the owner, priest, pagoda or family for feedback and approval over several rounds before printing.
Smoothing worn areas and cracks
Cracks and small chips are filled in the file. With antique statues, however, owners sometimes want to keep the marks of time. CT3D will ask clearly about the desired level of “renewal”: restored as new, or preserving its aged character.
Rescaling and sectioning
The restored copy can keep the original size, be enlarged for outdoor display or be scaled down as a souvenir. Statues larger than the printer’s build volume are split into sections along drapery folds or hidden areas, with locating pins and rod holes for accurate reassembly.
Step 4: 3D Printing the Restored Copy – Choosing a Technology by Size
| Technology | Layer height | Tolerance | Best for |
|---|---|---|---|
| SLA resin | 25–100 microns | ±0.05–0.1 mm, details down to 0.05 mm | Faces, hands, ornamentation; small and medium statues |
| Large-format resin | 25–100 microns | ±0.05–0.1 mm | Large statues in one piece or few sections, up to 800×800×500 mm per section |
| FDM | 100–300 microns | ±0.1–0.3 mm | Very large statue bodies, mold patterns finished afterward |
| Castable resin | 25–100 microns | ±0.05–0.1 mm | Small parts for bronze casting (crowns, accessories) |
Source: CT3D technology specification sheet, 2026.
CT3D’s resin printing experience: tilt the model 20–45°, keep resin at 25–28 °C, and the failure rate stays below 5%. Typical defects are collapsed prints, “noodle strings” (long sticky resin strands) and layer separation – all controlled through proper orientation and supports. For large statues, see also large-format resin 3D printing.
Step 5: Mold Making, Casting and Paint Finishing
The 3D print can be the final product (after painting) or the master pattern for a mold. When the statue will stand outdoors, multiple copies are needed, or a heavy, solid material like stone or bronze is required, CT3D usually prints a master and then makes a silicone mold from the 3D print, followed by composite or polyresin casting. See our composite statue manufacturing service.
Painting determines whether the restored copy captures the “soul” of the original: recreating the colors of the robes and skin, gold trim, or faux bronze, stone and wood finishes. Detailed techniques are covered in painting 3D printed models.

Step 6: Inspection – Comparing the Restored Copy with the Original Data
CT3D offers 3D inspection: we rescan the print and compare it with the reference model, producing a color deviation map. For statues assembled from many sections, this step catches warped or misaligned sections before assembly and painting, avoiding rework at the most expensive stage.
Common Problems in Statue Restoration with 3D Scanning, and How to Fix Them
| Problem | Cause | Fix |
|---|---|---|
| Many holes in hidden areas of the model | The scanner can’t see into deep recesses | Additional scans from more angles, fill holes following the surrounding shape |
| Loss of detail in the face | Over-decimated mesh, low-resolution scan | Keep high density on the face and hands; scan key areas separately in detail |
| Reconstructed parts look “off-style” | Insufficient reference material, modeled by feel | Gather old photos and statues of the same model; approve renders over several rounds |
| Sections misaligned or gapping | No locating pins, material shrinkage | Design locating pins, 3D-inspect each section, test-assemble before painting |
| Noisy scan surface on glossy statues | Reflective gilding or gloss paint | Adjust exposure, change scanning method, use a temporary spray after testing on a hidden area |
| Enlarged statue looks coarse | Original data lacks detail for the larger scale | Scan at higher resolution, add detail with digital sculpting |
Source: CT3D restoration and 3D scanning project experience.
How Are the Cost and Lead Time of Statue Restoration Calculated?
Statue restoration is a custom project. Costs include: 3D scanning (at the workshop or on site), data processing and digital reconstruction (depending on the extent of damage), 3D printing (by technology and volume), mold making and casting (if needed), paint finishing and installation. Every statue differs in size, damage and material requirements, so CT3D surveys and quotes each statue individually. To estimate the printing and painting portion, you can refer to 2026 market rates in Ho Chi Minh City (not CT3D’s prices): standard resin at 20–30 cm costs about 3–7 million VND (≈ US$115–270), with sizes over 30 cm quoted per file; airbrush painting 600,000 – 2 million VND (≈ US$23–77) per piece. These prices are indicative.
Checklist: What to Send for a Statue Restoration Request
- Photos of the statue’s current condition from multiple angles, plus close-ups of damaged areas.
- Statue dimensions (height, width, depth), estimated weight and original material.
- Old archival photos of the statue when it was intact (if available).
- Your goals: restore as new or preserve its aged character; keep the scale or enlarge/reduce; number of copies.
- Where the statue will be placed: indoors or outdoors; whether the statue can be moved.
- Deadline (for example, before a feast day or festival).
Real Projects and Applications
CT3D has published several flagship projects: the restoration of an Our Lady of La Vang statue, a large reclining Buddha statue, a 1 m tall SLA-printed Catholic statue, and a Ca Mau shrimp model. Digital restoration is used for devotional statues in churches, pagodas and communal temples; ancestral and portrait statues; architectural decorative statues; and digitizing artifacts for archiving and display replicas while keeping the originals safe. For brand-new religious statues, see religious statue 3D printing. An overview of model types and pricing is in our pillar article on custom 3D model printing.
Frequently Asked Questions
Does 3D scanning damage the original statue?
No. The scanner only projects light or a laser and takes images; it never touches the statue. Only when an anti-glare spray is needed will CT3D test it on a hidden area and ask the owner first.
Can a statue with missing parts be restored?
Yes. Missing parts are rebuilt on the computer by mirroring intact parts or by digital sculpting from archival photos, with renders for approval before printing.
Can the statue be enlarged during restoration?
Yes. The digital model is easy to rescale. Large statues are split into sections with locating pins; each resin section can be up to 800×800×500 mm.
What materials are restored copies made of?
The painted resin or FDM print can be used directly, or the print can serve as a master for composite or polyresin casting; small parts can be printed in castable resin for bronze casting.
How long does statue restoration take?
It depends on size and the extent of damage. CT3D surveys the statue and then gives a specific schedule for each stage: scanning, digital reconstruction, printing, casting and painting.
Real Footage from the CT3D Workshop
Watch Making a 4-meter Buddha statue master – 3D printing and CNC machining, filmed by CT3D, to get a clearer picture of the process and the finished quality. More videos are on our YouTube channel Chế Tạo Vlog – CT3D.
Contact CT3D – Send Your File, Get a Fast Quote
Whether you have a 3D file, a 2D drawing, photos or just an idea, you can send it to CT3D. Our engineers will check the file, recommend the right technology and material, and send you a quote with a lead time.
- Email: [email protected] – [email protected]
- Hotline / Zalo: +84 975 008 728 (Mr. Thai) – +84 985 936 728 (Mr. Dang), or use our contact form
- Head office: Binh Duong.
- Workshops in Ho Chi Minh City: Linh Trung (Thu Duc), Tam Binh (Thu Duc), District 6 (former).
- Other workshops and drop-off points: Can Tho, Da Nang, Bien Hoa, Ba Ria – Vung Tau, Hanoi, Hai Duong, Hai Phong. Nationwide delivery across Vietnam.
- Website: ct3dgroup.com – in3d.edu.vn
CT3D – 3D design & prototyping: 3D printing, 3D scanning, reverse engineering, silicone mold making, painting and finishing, CNC machining, composite fabrication, plus 3D printers and 3D printing materials.
Danh sách cửa hàng:
CT3D là đơn vị cung cấp trọn gói các dịch vụ thiết kế và sản xuất theo yêu cầu tại TP.HCM và khu vực lân cận (Bình Dương, Đồng Nai, Long An…). Với năng lực khép kín từ thiết kế 3D, in 3D (FDM, resin/SLA, SLS, in 3D kim loại), scan 3D – thiết kế ngược, làm khuôn, đúc composite – poly resin – poly stone đến gia công CNC và sơn màu hoàn thiện, CT3D đồng hành cùng khách hàng qua toàn bộ quy trình – từ ý tưởng, bản vẽ hay sản phẩm mẫu đến thành phẩm hoàn chỉnh. Dù bạn cần tạo mẫu nhanh, sản xuất số lượng, chế tác tượng – mô hình – quà tặng hay linh kiện kỹ thuật, đội ngũ CT3D sẽ tư vấn công nghệ và vật liệu phù hợp, đảm bảo sản phẩm sắc nét, đúng yêu cầu và tối ưu chi phí. Khách hàng tại TP.HCM và vùng lân cận có thể trao đổi trực tiếp, gửi file online và nhận sản phẩm thuận tiện, hỗ trợ cả đơn gấp lẫn dự án số lượng.
CT3D cung cấp trọn gói các dịch vụ thiết kế và sản xuất theo yêu cầu, phục vụ khách hàng tại Hà Nội và các tỉnh lân cận (Bắc Ninh, Hưng Yên, Hải Phòng, Vĩnh Phúc…). Với năng lực khép kín từ thiết kế 3D, in 3D (FDM, resin/SLA, SLS, in 3D kim loại), scan 3D – thiết kế ngược, làm khuôn, đúc composite – poly resin – poly stone đến gia công CNC và sơn màu hoàn thiện, CT3D đồng hành cùng khách hàng qua toàn bộ quy trình – từ ý tưởng, bản vẽ hay sản phẩm mẫu đến thành phẩm hoàn chỉnh. Quy trình làm việc thuận tiện: bạn gửi file 3D hoặc mô tả ý tưởng qua online, đội ngũ CT3D tư vấn công nghệ – vật liệu, báo giá nhanh và giao hàng tận nơi tại Hà Nội. Dù bạn cần tạo mẫu nhanh, sản xuất số lượng, chế tác tượng – mô hình – quà tặng hay linh kiện kỹ thuật, CT3D đều đáp ứng với sản phẩm sắc nét, đúng yêu cầu và tối ưu chi phí.

