
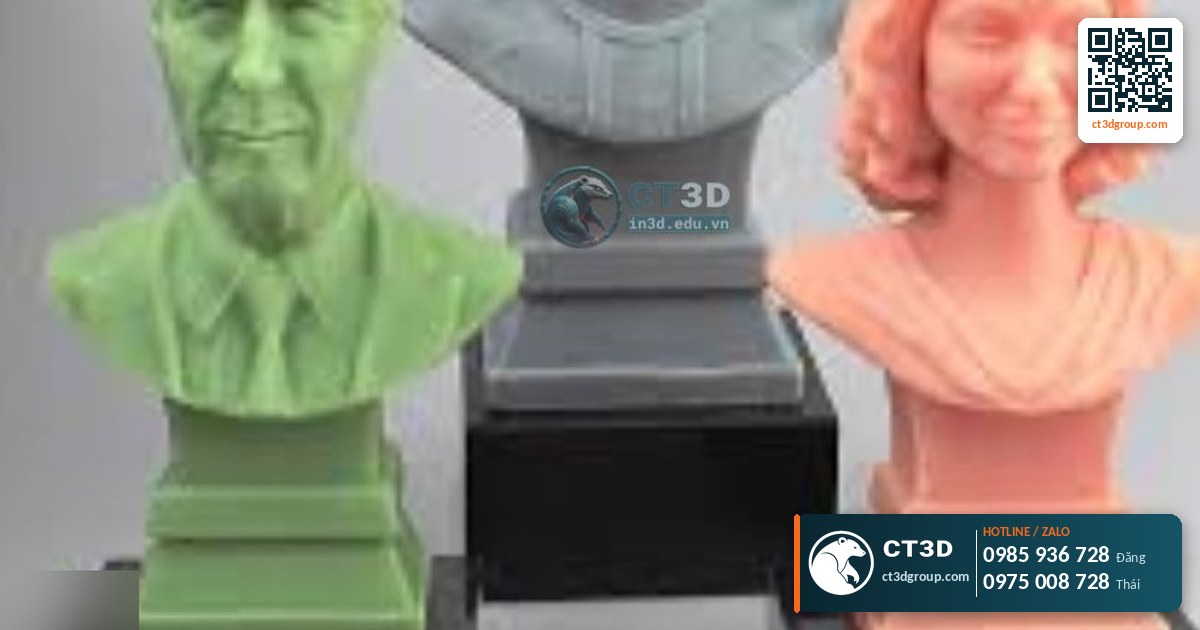
Quick answer: Printing castable resin jewelry patterns means printing master patterns in wax-filled or clean-burning castable resin on DLP/SLA machines (25–100 micron layers, DLP tolerance ±0.03–0.08 mm), then investing them in heat-resistant plaster, burning out the pattern completely and pouring metal (gold, silver, bronze) into the cavity. This method is called lost-wax casting. Advantages: details down to 0.05 mm, no hand wax carving, and fast design changes. Castable printing price: quoted per file.
Jewelers and bronze foundries usually come to CT3D for one reason: hand-carving wax takes days for a single patterned ring, is hard to repeat precisely, and is hard to change when the client changes their mind. Castable resin printing solves all three. But to cast clean metal without porosity or cracked molds, the printed pattern must be designed and processed correctly. This article digs into exactly that. For general information on resin types and prices, see our pillar article on resin 3D printing.
How Does Lost-Wax Casting with Castable Resin Work?
Lost-wax casting is a technique thousands of years old, and it is still the main method for casting jewelry and small bronze statues. What is new is that the master pattern is 3D printed instead of carved in wax. The process has six steps:
- Print the pattern: print it in castable or wax resin, with the sprue (the metal feed channel) included or attached afterward.
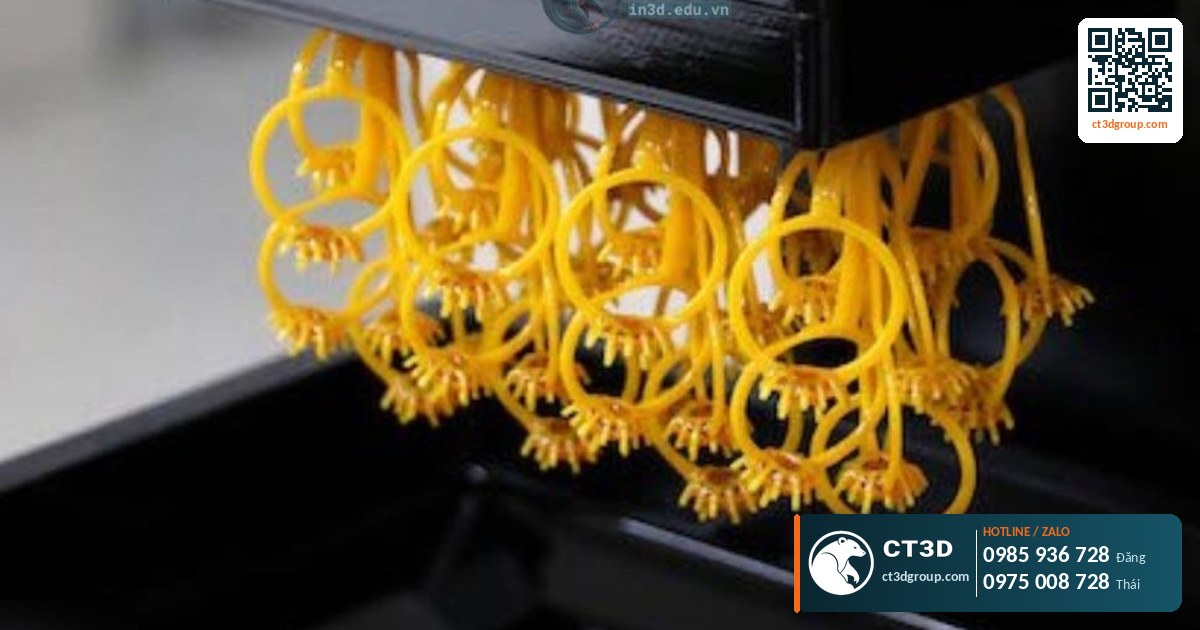
- Build the tree: many small patterns are welded onto a common wax trunk, forming a “tree” so many pieces can be cast at once.
- Invest: place the tree in a steel flask, pour in investment plaster mixed with water, and vacuum it to remove air bubbles.
- Burnout: put the flask in a kiln and raise the temperature in several stages. The resin pattern melts, burns and vaporizes, leaving a cavity in the exact shape of the pattern.
- Pour the metal: pour molten metal into the mold, usually with vacuum or centrifugal assistance so the metal fills fine details.
- Break out and finish: break away the plaster, cut off the tree, grind, polish, set stones and plate.
The key difference between castable resin and standard resin lies in step 4. Standard resin leaves ash and carbon residue in the mold during burnout, causing porosity and a dirty metal surface. Castable resin is formulated to burn out cleanly with little ash. Wax-filled resin also melts and flows out before burning, reducing pressure on the mold walls.
Castable Resin vs Wax Resin: What’s the Difference?
CT3D offers both groups: castable resin and wax resin. Which one to choose depends on the pattern details and the foundry’s process.
| Criterion | Castable resin (clean burn) | Wax resin (wax-filled) |
|---|---|---|
| Printed pattern hardness | Harder, easy to handle and sprue | Softer, must be handled gently |
| Detail sharpness | Very high | High |
| Burnout behavior | Expands, then burns; needs a proper burnout cycle | Melts out first, less likely to crack the mold |
| Investment requirements | Best with an investment suited to resin | Compatible with standard investments |
| Best for | Fine filigree rings, detailed pendants | Thick, solid patterns; foundries used to wax workflows |
Sources: CT3D materials documentation; specific burnout cycles per the resin manufacturer’s instructions.
An important note: resin expands more than wax when heated. If the temperature rises too fast, the pattern expands before it has time to burn out and can crack the plaster mold walls. When metal is poured, these cracks become “fins” of excess metal (flash) on the piece. That is why burnout cycles for resin usually include longer holds in the low and medium temperature ranges.
Technical Specifications for Printing Jewelry Casting Patterns
| Parameter | Value | Why it matters for casting |
|---|---|---|
| Technology | DLP / SLA | DLP suits small jewelry; SLA suits larger patterns such as small bronze statues |
| Layer thickness | 25–100 microns | Jewelry is usually printed at 25–50 microns to reduce metal polishing |
| DLP tolerance | ±0.03–0.08 mm | Keeps ring sizes and stone settings accurate |
| SLA tolerance | ±0.05–0.1 mm | Sufficient for small statues and accessories |
| Smallest detail | Down to 0.05 mm | Patterns, engraved text, surface textures |
| Print tilt angle | 20–45° | Reduces support marks on patterned surfaces |
| Resin temperature | 25–28 °C | Castable resin is temperature-sensitive; keep it warm for stable printing |
Source: CT3D technical documentation.
The differences between SLA, DLP and LCD directly affect the sharpness of casting patterns. We analyze them in detail in SLA vs DLP vs LCD.
How to Design Casting Pattern Files for Fewer Defects
Compensate for metal shrinkage
Metal shrinks as it cools from liquid to solid, so the printed pattern must be slightly larger than the final piece. The amount of shrinkage depends on the metal, alloy, investment and geometry, and is typically a few percent. The standard approach: ask your foundry for its actual shrinkage factor, then scale the file. Rings need their own calculation, because an error of 0.1–0.2 mm in inside diameter already means the wrong size.
Example: a ring with a target inside diameter of 17.0 mm, and the foundry reports a 1.5% shrinkage factor for the alloy in use. The pattern’s inside diameter = 17.0 × 1.015 ≈ 17.26 mm. Without compensation, the ring would come out at about 16.75 mm – a full size off. You should also allow for material lost when polishing the inside surface.
Wall thickness and thick sections
- Walls too thin: the metal freezes before the cavity fills, leaving missing details. For jewelry, keep walls at or above the foundry’s recommended minimum.
- Sections too thick: waste metal, are prone to shrinkage porosity at the center, and during burnout the resin expands more and can crack the mold. For large pendants, hollow out the back or core the piece.
- Abrupt thick-to-thin transitions: use smooth fillets so the metal flows evenly.
Sprue placement
Attach the sprue to the thickest part of the pattern so the metal flows from thick to thin and the thick areas are “fed” with metal as they shrink. Place the sprue on a surface that is easy to polish, never on the main decorative face. Many foundries ask CT3D to print the sprue as part of the pattern to save spruing time.
Prongs and stone settings
Prongs are the thinnest features and are prone to incomplete fill or breaking during stone setting. Design prongs thick enough, with extra length for the setter to bend, and check that the seat height matches the actual stone dimensions. More guidance on wall thickness and drain holes for resin patterns is in our article on resin print file design.
Common Defects When Casting from Resin Patterns and How to Fix Them
| Defect on the metal piece | Common cause | Fix |
|---|---|---|
| Metal fins, unexpected ridges | Mold cracked by resin expansion during fast burnout | Burnout cycle with temperature holds; use wax resin for thick sections |
| Surface porosity, dirty surface | Ash or resin residue not fully burned out | Hold long enough at high temperature; use the correct castable resin |
| Missing details, short prongs | Walls too thin, sprue misplaced | Increase thickness, sprue to the thick section, use vacuum/centrifugal casting |
| Internal shrinkage porosity | Thick section not fed with metal | Core it out, add auxiliary sprues |
| Rough surface, layer lines | Thick layers, pattern not clean | Print at 25–50 microns, wash and cure properly |
| Wrong size | Metal shrinkage not compensated | Get the foundry’s shrinkage factor and scale the file |
Source: CT3D experience working with foundries.
Castable patterns must be washed thoroughly and cured to the right level: under-cured patterns are soft and deform during spruing; over-cured patterns of some resins burn out less cleanly. General processing guidance is in our article on resin print post-processing.
Castable Printing Applications Beyond Jewelry
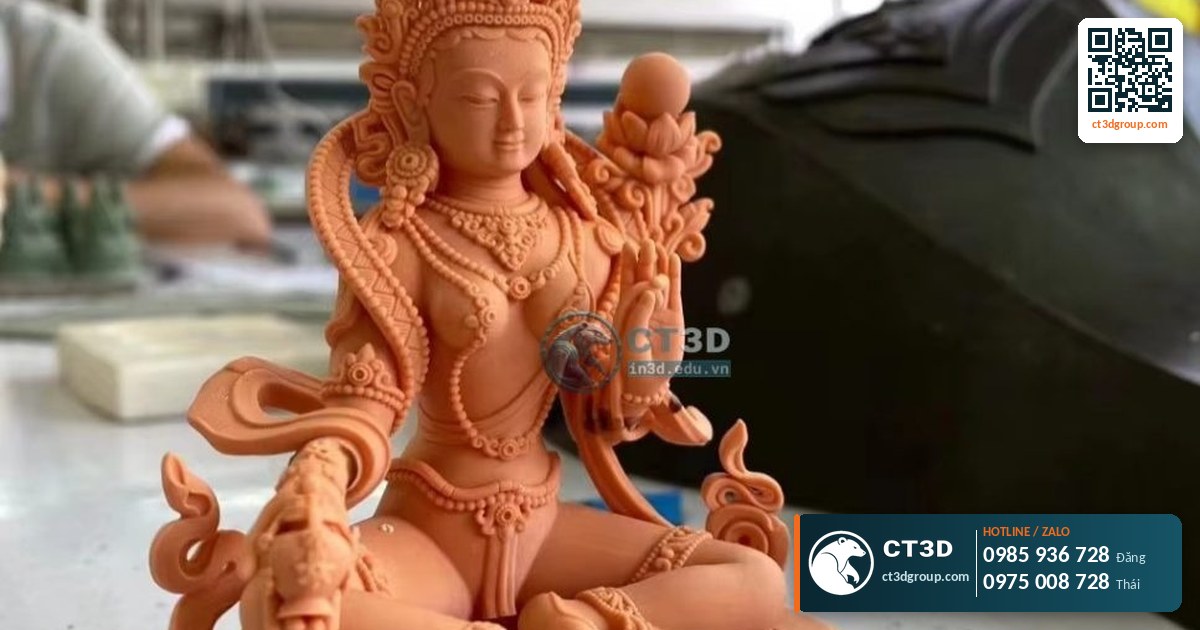
- Small bronze statues, mascots, gifts: print the pattern in SLA, cast in bronze, apply an antique patina.
- Badges, metal logos, trophies: fine lettering and complex logos.
- Small, complex mechanical parts: low-volume metal casting when direct metal printing is not yet needed.
- Dental: casting patterns for metal frameworks in dental labs (see our article on dental and medical resin 3D printing).
When many identical pieces are needed, instead of printing a castable pattern for each one, the workshop can print a single master and make a rubber/silicone mold to inject wax in volume. Mold-making techniques are covered in what silicone mold making is. This saves money at higher volumes, while direct castable printing is best when every piece is unique, designs change often, or details are too fine for wax injection.
Hand Wax Carving vs Castable Printing vs Direct Metal Printing
| Criterion | Hand wax carving | Castable resin printing + casting | Direct SLM metal printing |
|---|---|---|---|
| Fine details | Depends on the carver’s skill | Down to 0.05 mm, precisely repeatable | Good, 6–10 µm surface roughness |
| Design changes | Carve again from scratch | Edit the file, reprint | Edit the file, reprint |
| Precious metals | Yes | Yes (gold, silver, etc.) | Limited, mainly engineering metals |
| Best for | One-off handcrafted pieces | Jewelry, small bronze statues | Engineering parts in stainless steel, titanium, aluminum |
Source: CT3D technical documentation.
Checklist for Ordering Casting Patterns from CT3D
- 3D file (STL, OBJ, 3MF or STEP); if you only have photos or drawings, CT3D offers 3D modeling.
- The metal to be cast and your foundry’s shrinkage factor (if known).
- Whether the sprue should be printed with the pattern, and the preferred sprue location.
- Ring size, stone dimensions and any critical dimensions.
- Number of patterns and deadline. Ready files usually take 1–3 days; modeling takes 3–7 days.
Process: we receive the file → an engineer checks thickness, shrinkage compensation and print orientation → quote per file with lead time → print, wash, cure and pack with impact protection → door-to-door delivery (Viettel Post, Giao Hang Tiet Kiem, Vietnam Post, air freight) or pick-up at the workshop. Learn more about high-resolution resin printing at in3d.edu.vn. To compare castable with other resin types, read our pillar article on resin 3D printing.
Frequently Asked Questions
Can castable resin be used to cast gold and silver?
Yes. Castable resin and wax resin are used as master patterns for lost-wax casting of gold, silver and bronze. A suitable burnout cycle is needed so the pattern burns out cleanly without cracking the plaster mold.
Can standard resin be used for casting?
Not recommended. Standard resin leaves a lot of ash and residue during burnout and expands strongly, often causing surface porosity and cracked molds. Use castable resin or wax resin instead.
How accurate are 3D printed jewelry casting patterns?
DLP printing has a tolerance of about ±0.03–0.08 mm, with details down to 0.05 mm. The final dimensions also depend on the metal’s shrinkage factor, which must be compensated in the file.
How much does castable pattern printing cost?
CT3D quotes per file, depending on pattern volume, resin type, quantity and whether the sprue is printed with the pattern.
Real Footage from the CT3D Workshop
Watch the video Metal, SLA, MJP wax and PA12 3D printing, produced by CT3D, to get a clearer picture of the process and the quality of the finished parts. More videos are available on our channel Che Tao Vlog – CT3D.
Contact CT3D – Send Your File, Get a Fast Quote
Whether you have a 3D file, a 2D drawing, photos or just an idea, you can send it to CT3D. Our engineers will check the file, recommend the right technology and material, and send you a quote with a lead time.
- Email: [email protected] – [email protected]
- Hotline / Zalo: +84 975 008 728 (Mr. Thai) – +84 985 936 728 (Mr. Dang), or use our contact form
- Head office: Binh Duong.
- Workshops in Ho Chi Minh City: Linh Trung (Thu Duc), Tam Binh (Thu Duc), and former District 6.
- Other workshops and drop-off points: Can Tho, Da Nang, Bien Hoa, Ba Ria – Vung Tau, Hanoi, Hai Duong, Hai Phong. Nationwide delivery.
- Website: ct3dgroup.com – in3d.edu.vn
CT3D – 3D design & prototyping: 3D printing, 3D scanning, reverse engineering, silicone mold making, painting and finishing, CNC machining, composite fabrication, and supply of 3D printers and 3D printing materials.
Danh sách cửa hàng:
CT3D là đơn vị cung cấp trọn gói các dịch vụ thiết kế và sản xuất theo yêu cầu tại TP.HCM và khu vực lân cận (Bình Dương, Đồng Nai, Long An…). Với năng lực khép kín từ thiết kế 3D, in 3D (FDM, resin/SLA, SLS, in 3D kim loại), scan 3D – thiết kế ngược, làm khuôn, đúc composite – poly resin – poly stone đến gia công CNC và sơn màu hoàn thiện, CT3D đồng hành cùng khách hàng qua toàn bộ quy trình – từ ý tưởng, bản vẽ hay sản phẩm mẫu đến thành phẩm hoàn chỉnh. Dù bạn cần tạo mẫu nhanh, sản xuất số lượng, chế tác tượng – mô hình – quà tặng hay linh kiện kỹ thuật, đội ngũ CT3D sẽ tư vấn công nghệ và vật liệu phù hợp, đảm bảo sản phẩm sắc nét, đúng yêu cầu và tối ưu chi phí. Khách hàng tại TP.HCM và vùng lân cận có thể trao đổi trực tiếp, gửi file online và nhận sản phẩm thuận tiện, hỗ trợ cả đơn gấp lẫn dự án số lượng.
CT3D cung cấp trọn gói các dịch vụ thiết kế và sản xuất theo yêu cầu, phục vụ khách hàng tại Hà Nội và các tỉnh lân cận (Bắc Ninh, Hưng Yên, Hải Phòng, Vĩnh Phúc…). Với năng lực khép kín từ thiết kế 3D, in 3D (FDM, resin/SLA, SLS, in 3D kim loại), scan 3D – thiết kế ngược, làm khuôn, đúc composite – poly resin – poly stone đến gia công CNC và sơn màu hoàn thiện, CT3D đồng hành cùng khách hàng qua toàn bộ quy trình – từ ý tưởng, bản vẽ hay sản phẩm mẫu đến thành phẩm hoàn chỉnh. Quy trình làm việc thuận tiện: bạn gửi file 3D hoặc mô tả ý tưởng qua online, đội ngũ CT3D tư vấn công nghệ – vật liệu, báo giá nhanh và giao hàng tận nơi tại Hà Nội. Dù bạn cần tạo mẫu nhanh, sản xuất số lượng, chế tác tượng – mô hình – quà tặng hay linh kiện kỹ thuật, CT3D đều đáp ứng với sản phẩm sắc nét, đúng yêu cầu và tối ưu chi phí.

